Corn ….. A LOT of work and very time-consuming, with little yield, but well worth the effort!
Especially when you can spend quality time with people you love. I enjoy the time my mother and I spend together when preparing corn for freezing.
Oh, and, it’s not too bad when right smack dab in the middle of a cold, cold winter you can go to your freezer, pull out a bag and have fresh corn with some fresh green beans, that you canned, and a big ol pone of cornbread! YUMMY
I think I just gained 10 pounds! HA
Here, once again, is how my grandmother, my mother and now I, “put up” corn for the long winter months ahead.
First, gather your corn. About 150 ears of corn will produce about 15 bags, give or take a few!
Shuck your corn and remove silks.
We use a little soft to medium bristled brush. Brush the corn firmly, but not so hard that it damages the kernels, to remove silks.
Those are my mothers beautiful hands you see in this picture.

Once you have all your corn silked, put it into a large tub and cover with an old sheet or something to keep it from drying out.

Have a clean tub of water ready for rinsing the corn right before you are ready to cut it off the cob.

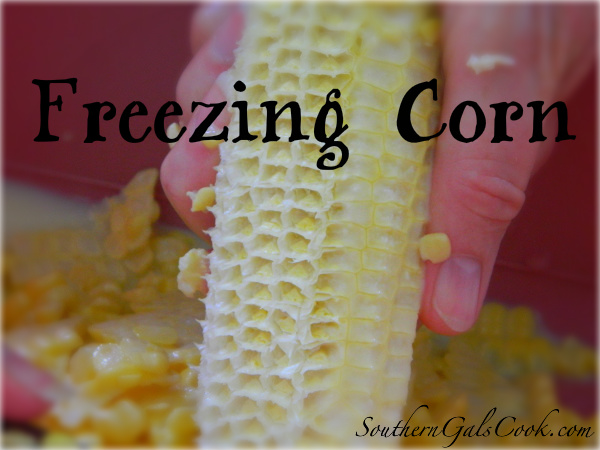
Using a very sharp knife cut the top layer of kernels off the cob.

Once you have removed the top layer of kernels, using the dull side of you knife, scrape the cob to remove the rest of the kernels.
This makes the corn creamy and oh so good!

I am sorry to say this is where I dropped the ball on taking pics. It was getting very late, and I was getting very tired and I forgot to take pics.
But, I should be putting up more before the end of summer and I will take pics of the completed task then and get them on here.
Anyway, after you have all you corn cut off the cob you are ready to cook it.
To prevent scorching the corn as it is cooking it is best to cook it in small batches. I usually use 3 – 5 quart stock pots and I fill them only about half way full.
You may need to add a little bit of water, not much, just enough to keep it from scorching and sticking to the bottom of your pot.
On medium-low heat bring corn to a slight boil, stirring frequently. I usually let my cook long enough to get all the corn hot. Usually about 20 to 30 minutes.
Do not try to bring your corn to a boil over high, medium-high, or medium heat, and make sure you stir the corn every time you turn around. Otherwise, you will end up with scorched/burned corn.
Which is not good!
But if you happen to scorch it just a little bit, don’t worry, you can hopefully save it.
You can pour, not scrape, the “good” corn into another pot and finish cooking. Make sure you don’t scrape the bottom of the pan or you will get the scorched corn.
Which is not good!
After your corn is cooked, pour the cooked corn out of the hot pots into a dish pan, or very large bowls. Let cool completely before bagging. This will help to prevent ice crystals from forming on the corn when put in the freezer.
Using a canning funnel and quart sized freezer bags, pour about 3 cups corn into each bag. Remove as much air as possible and freeze.Then enjoy the fruits of your labor all winter long!

